Exploring The World Through High Dynamic Range
Welcome to another edition of Let’s Talk Photography!
Have you ever seen one of those photos that look amazingly surreal with the bright, vibrant colors in the sky and the dreamy looking lights or the rich textures that almost pop off the screen or paper? When you see those photos you’re probably like me and you’re thinking “how in the world did the photographer capture such a beautiful and brilliantly lit moment like this?” Well, there’s a very popular method of taking photos that’s been all the rage while, at the same time, looked down on and it’s called High Dynamic Range photography, or HDR for short. Whether you’ve ever tried HDR or just heard of it, I’m sure you’ve seen it in action. What you may not know is that you’ve seen it and didn’t realize it because the image you saw looked so realistic and not surreal like one would expect from an HDR processed image. Let’s take a moment to explore what HDR is and how these photos are made.
High Dynamic Range photography is the whole reason why I went from a small pocket point ‘n shoot camera to the clunky, huge DSLR that I have today. I was attending a few meetings at a local nature photography club and the idea of taking up photography as a hobby was festering and smoldering in the back of my mind but I wasn’t really interested in sitting under a tree and waiting for a bird to open its wings just so I could miss the shot and be disappointed with my new hobby. I was looking for another way to express myself and, in my online searches I found something that blew me away and made me proclaim “I WANT TO LEARN HOW TO DO THAT!!” Okay, it wasn’t that dramatic, but it was close.
I had stumbled across some videos and tutorials that showed how you can set your camera up to take three or more shots in rapid succession and then fuse the images together to create a wonderfully dreamy and artistic version of reality. So, I grabbed my pocket camera and checked to see if I could set it up the way I had learned and I headed out onto the streets of Jamestown determined to break ground on a new and fascinating form of artistry never before seen in our area. Although, it didn’t take long for me to discover that it wasn’t so new and it had definitely been seen and practiced in our community by other local photographers and hobbyists.
Simply put, HDR is when you set the shooting mode on your camera to take three or more shots on a single press of the shutter button. In doing so, the camera will be able to record one photo that is properly exposed and then immediately capture a second photo that is about one full stop brighter (or over-exposed) and a third photo that is one full stop darker (or under-exposed). By doing this, you capture your image and then you have reference images to load into a software program that will use the under-exposed image to bring back detail in brightly lit parts of your image and you have the over-exposed image to restore the parts of the image that you could normally see but appear to be lost in the shadows and dark areas of the photograph. This comes in very handy when you’re shooting landscapes or scenes that have a lot of rich detail and light. It’s also a good way to shoot in lighting that is kind of “blah.”
Taking the photos is the easy part. The hard part is when you have to show a bit of restraint while using the software to make sure you don’t overdo the exaggerated colors and tonal values and end up with something that looks like a cartoon. Trust me, I’ve been down that road all too many times. Photographers who sit up on their own pedestal will look at these “blown out” photos, as they call them, and laugh and snicker over the amateurish use of this method. I’m here to tell you a secret, though, and that is they all started out by doing the exact same thing so don’t let anyone try to talk you out of exploring this method.
There are several software titles that will help you to create these wonderful works of art. The one I started out with and still use to this day is a stand-alone program called Photomatix Pro. Another popular software package that is extremely powerful and, best of all, FREE is HDR Efex Pro which is part of the Nik software plugins that can be used within Photoshop, Photoshop Elements, Lightroom and Apple Aperture. There are a bunch of other packages that create great images but these are the two that I’ve used the most and still use as part of my workflow when I’m shooting architectural scenes or landscapes. Search for these titles on the Internet and you’ll be able to learn all about how they are used and see wonderful examples of images that were made using this style of photography.
If you think you are interested in taking a dive into this style, then visit the website StuckInCustoms.com and follow the work of Trey Ratcliff, one of the leading HDR photographers who also started out by using Photomatix. His work will inspire you to create realistic and dynamic images. Studying his images will help you to see how the application of this method can be used to bring a photograph to life in ways you didn’t think possible. He has several tutorials that will help you along the way. And, if you’re using a newer Apple computer, you can benefit from the collaborative development of his HDR software package called Aurora HDR.
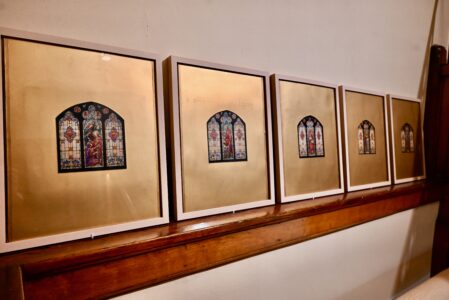
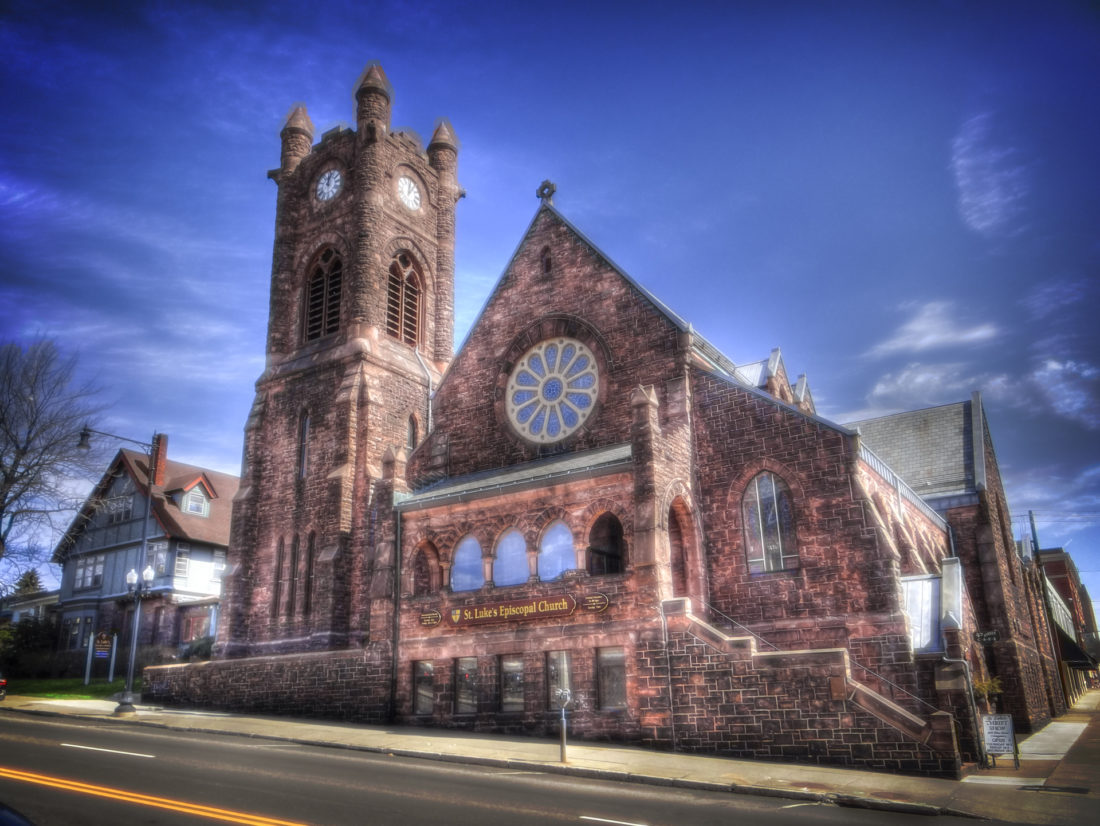
My only advice, if you want to give this a try, is to go easy on the saturation and exaggeration of the tones and colors of your image. They always look awesome when you first start doing it, but eventually you realize that it’s way too much and you find yourself laughing at your own work before too long. I’ve included a couple images that demonstrate “blown out” colors and tones the way I processed them when I started doing HDR (exterior shot of St. Luke’s church on Main St. in Jamestown) and an example of a more realistic and dynamic image that isn’t so exaggerated (interior shot of the same church).
We’ll talk more about HDR as we continue to explore photography styles and techniques. I’d love to see examples of your HDR work or, if you want to try and you need a little help, show me what you’re working on and I’ll try to get you on the right path. You can submit your photos in my Facebook group Shoot ‘n Share Chautauqua. Just click the join button and once I get you into the group you’ll be able to
share your photos and ask questions. I happen to know a half dozen or so photographers in that group that are actively shooting HDR images and we’d all love to see what you’re working on!
Until next week, happy shooting!
Is there a topic that you’d like to learn more about? Send feedback, share your photos, or offer topic suggestions to talkphotos@ecklof.com. If you’re looking for a place to connect with local photographers in Chautauqua County, search for the group “Shoot ‘n Share Chautauqua” on Facebook.
Local News
Fredonia Mayor Sounds New Warnings Over Water Situation
Fredonia Mayor Michael Ferguson said Fredonia “will be a ghost town” unless a plan to connect with the North ...

Eagles Club Recognizes Hall Recipient
Salvation Army Anew Center To Hold Tabling Event Thursday For Sexual Assault Awareness
Warren Woman Charged After Driving In Stolen Vehicle
A Warren woman has been charged after allegedly driving a stolen vehicle on Fairmount Avenue in Lakewood. ...

DCSD mourns principal’s death